


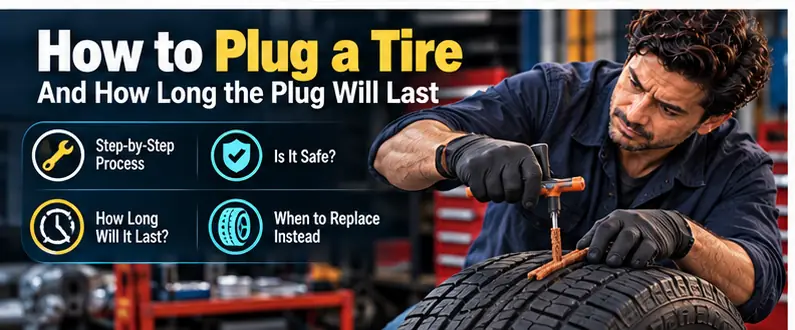
A screw in the tread, a tire that loses a few psi every day, and no tire shop open until Monday. That is the moment a $10 rope plug kit earns its spot in the trunk. Knowing how to plug a tire can turn a ruined afternoon into a 20-minute roadside job, but only if the plug goes in correctly and you understand exactly what it can and cannot do.
The short version: a well-installed outside plug will usually seal a small tread puncture well enough to get you home or to a shop, and it is a temporary repair, not a permanent one. This guide walks through the full process with a rope plug kit, including the safety steps most kit instructions skip, then covers what makes a plug hold or fail, how to keep an eye on it afterward, and how a plug compares with the inside repair a tire shop should finish the job with.
How this guide was put together: This guide is general information based on common manufacturer and industry guidance; your owner’s manual is the controlling source. Prices are typical ranges, not quotes. Checked on October 22, 2026.
Table of Contents
Before You Start: Can This Puncture Be Plugged?
Not every hole is a candidate. Spending two minutes on this check prevents you from sealing a tire that should never go back on the road.
A puncture is a reasonable candidate for a temporary plug when:
- It sits in the tread area, the part of the tire that touches the road, and not in the shoulder or sidewall
- It is 1/4 inch or smaller in diameter, the size left by a typical nail or screw
- It is a round puncture, not a cut, slash or tear
- The tire has not been driven while flat or badly underinflated
- The tire shows no bulges, exposed cords or cracking, and has reasonable tread left
Skip the plug and use the spare or call for help if any of these apply:
- The damage is in the sidewall or shoulder. Those areas flex constantly, and no repair of any kind is considered safe there.
- The hole is larger than 1/4 inch, or there are several punctures close together
- The tire was run flat, even briefly. Rolling on a deflated tire crushes the sidewall against the wheel and can damage the inside in ways you cannot see.
- There is an old repair in or overlapping the same spot. Never stack a second plug into a failed one.
A plug fills a hole. It cannot fix a tire that was damaged by being driven flat, and it cannot make a sidewall puncture safe.
What You Need
Most rope plug kits sold at auto parts stores contain the essentials. Check yours before you need it, because a missing piece at the roadside is a long wait.
| Item | What It Does | Notes |
|---|---|---|
| Rope plugs (sticky cord strips) | Fill and seal the puncture | Keep spares; they can dry out with age |
| Reamer (spiral rasp tool) | Cleans and roughens the puncture channel | T-handle tools are much easier to push |
| Insertion needle | Carries the plug into the hole | Look for a split or open-eye needle |
| Rubber cement (if included) | Lubricates and helps the plug bond | Some plugs come pre-coated |
| Pliers | Pull out the nail or screw | Needle-nose works best |
| Utility knife or snips | Trim the plug | A sharp blade gives a cleaner cut |
| Air compressor or pump | Reinflates the tire | A plug kit does not add air |
| Tire pressure gauge | Confirms correct pressure | Do not rely on the dash readout alone |
| Spray bottle of soapy water | Finds the leak and checks the seal | Dish soap in water works fine |
A portable 12-volt compressor is the item drivers most often forget. Without one, a plugged tire is still a flat tire.
How to Plug a Tire Step by Step
Set Up Safely First
- Get well away from traffic. Pull onto a level parking lot, side street or wide shoulder. Turn on your hazard lights.
- Secure the car. Put the transmission in Park (or in gear for a manual), set the parking brake and turn off the engine. Chock the wheel diagonally opposite the flat if you have chocks.
- Find the puncture. Inflate the tire enough to work with, then look for the nail or screw head. If nothing is visible, spray soapy water across the tread and watch for growing bubbles.
- Mark the spot with chalk, a paint pen or tape so you do not lose it once the object comes out.
- Lift the car only if you have to. You can often reach the puncture by rolling the car a few feet. If you must raise it to rotate the tire, use the jack at the manufacturer’s lift point on firm ground, and never put any part of your body under a car held up only by a jack.
Install the Plug
- Pull the object out. Grip the nail or screw with pliers and pull it straight out, noting the angle it went in. Air will start escaping, so move on to the next step promptly.
- Ream the hole. Push the reamer into the puncture along the same angle the object took, then work it in and out several times. This clears debris and roughens the channel so the plug can grip. The tool takes real effort to push; brace yourself and keep your hands clear of the sharp tip.
- Load the plug. Thread one rope plug through the eye of the insertion needle and center it so equal lengths hang on each side. If your kit includes rubber cement, coat the plug.
- Insert it. Push the needle straight into the hole along the reamed path until roughly two-thirds of the plug is inside the tire and about half an inch of each end remains outside. Do not push the needle all the way in.
- Pull the tool out. Withdraw the needle straight out in one firm motion without twisting. The plug stays behind, folded inside the puncture.
- Trim the ends. Cut the plug close to the tread surface, following your kit’s guidance. Leaving a short stub is fine; it will wear down as you drive.
Check the Seal
- Inflate to the right pressure. Use the pressure printed on the placard inside the driver’s door jamb, not the maximum molded into the sidewall. Confirm it with a gauge.
- Test for leaks. Spray soapy water over the plug. A steady stream of bubbles means the plug did not seal, and the safest move is to stop and use the spare rather than forcing a second plug into the same hole.
- Drive a short distance at low speed, then recheck pressure. A plug often settles in during the first few miles, and a quick check confirms it is holding.
How Long a Tire Plug Lasts
Here is where many plug kit owners get into trouble. A rope plug can seal a hole for months, and that persuades plenty of drivers to forget about it. The issue is not only whether the plug holds air. A plug installed from outside means nobody has looked inside the tire, nothing has sealed the inner liner, and any damage the nail did to the belts or the liner is still there.
That is why the tire industry treats an outside plug as temporary. A conservative rule of thumb is to drive no more than about 100 miles over a few days before the tire gets a proper repair. Some plugs will hold far longer, but there is no way to know in advance which ones, and the cost of being wrong at highway speed is high.
What Makes a Plug Hold
- A clean, small, round tread puncture. Nails and screws under 1/4 inch give the plug the best chance.
- Careful installation. Reaming along the original angle, inserting to the right depth and pulling the tool out cleanly all affect the seal.
- Fresh plugs. Old, dried-out plugs lose the tackiness that helps them grip and seal.
- Correct pressure and gentle driving. Moderate speeds, light loads and smooth roads keep heat and flexing down.
What Makes a Plug Fail
- A puncture near the shoulder. The closer the hole is to the edge of the tread, the more the rubber flexes and works the plug loose.
- Heat. Sustained highway speed, heavy loads, towing and hot pavement raise tire temperature, and heat is hard on any repair.
- Underinflation. A tire running low flexes more, runs hotter and stresses the plug with every revolution.
- Impacts. Potholes and curb strikes can unseat a plug or open a fresh leak.
- Hidden damage. A tire that was driven while low may already be weakened internally, and the plug cannot do anything about that.
Monitoring a Plugged Tire
Until the tire has been properly repaired, treat it as something to watch, not something to forget.
- Check pressure every day, before driving, with the tire cold. A slow seep shows up as a drop of a pound or two between checks long before your tire pressure warning light comes on.
- Look at the plug whenever you stop. It should sit firmly in the hole with no sign of moving or pulling through.
- Spray it with soapy water every couple of days, or anytime pressure drops.
- Inspect the whole tire for bulges, blisters or distortion. A bulge means internal cords have broken, and that tire needs replacing.
- Pay attention to how the car feels. New vibration, a pull toward one side or heavy steering are reasons to pull over and check.
- Keep speeds moderate and save highway trips, towing and heavy loads for after the repair.
If the plug starts leaking, do not drive on a tire that is losing air fast. Pull over safely, install the spare or call roadside assistance. Our guide to driving on a plugged tire covers speed limits, warning signs and what to do if a plug lets go on the road in more detail.
Plug vs. Proper Repair: What a Shop Does Differently
A shop repair goes further than a roadside plug. The technician removes the tire from the wheel, pulls your plug, inspects the inside for damage from underinflation, prepares the inner liner and installs a plug-patch combination. The stem fills the puncture channel so water cannot reach the steel belts, and the attached patch seals the inner liner so air cannot escape.
That repair is permanent within clear limits: the puncture must be in the tread area only and no larger than 1/4 inch. Shoulder and sidewall damage is never repaired. A correctly repaired tire can serve out its remaining tread life, though some tire makers restrict repairs on certain models, such as some run-flats, or limit the speed rating of a repaired tire. Check your tire maker’s policy if you drive a performance car or tow.
| Factor | Outside Rope Plug | Inside Plug-Patch Repair |
|---|---|---|
| Where it’s done | Roadside or driveway, tire stays on the car | Tire shop, tire removed from the wheel |
| Inner inspection | No | Yes |
| Seals inner liner | No | Yes |
| Permanent | No, temporary only | Yes, for eligible tread punctures |
| Typical cost | A few dollars per plug from a kit | Usually a modest shop fee, and free at many tire retailers |
| Best use | Getting home or to a shop | Returning the tire to normal service |
Our guide to the cost of patching a tire breaks down shop pricing and the add-on fees to ask about.
Pros of a DIY Tire Plug
- Fast. A practiced driver can plug a tire in about 15 to 20 minutes without removing the wheel.
- Cheap. A basic kit costs less than a single shop repair and holds enough plugs for several punctures.
- Self-reliant. It can save you a tow or a long wait, especially when the spare is a compact temporary unit or there is no spare at all.
- Saves the tire for a real repair. Plugging promptly can keep you from driving on a flat, which is what usually turns a repairable tire into scrap.
Cons of a DIY Tire Plug
- Temporary. It still needs a proper inside repair.
- No inspection. Damage inside the tire stays hidden.
- Limited scope. It is useless for sidewall or shoulder damage, cuts, or large holes.
- Can fail. A poor installation, heat or an impact can work it loose and cause sudden air loss.
- Effort and risk. Reaming takes force, and working near traffic or under a raised car is dangerous if done carelessly.
Related Reading
Frequently Asked Questions
With a complete kit and a compressor, most drivers can plug a tire in about 15 to 20 minutes, including finding the leak and reinflating. Your first attempt will take longer, so it helps to read the kit instructions before you need them.
Drive gently. Keep speeds moderate, avoid towing and heavy loads, and check pressure before each trip. A conservative guideline is about 100 miles over a few days before getting a proper inside repair.
No. A rope plug goes in from outside with the tire still on the car. You may need to roll the car or raise it on the jack to reach the puncture, but the tire stays mounted. A proper permanent repair, by contrast, requires removing the tire from the wheel.
Usually, yes, if the puncture is in the tread, no larger than 1/4 inch, and the tire was not driven flat. A shop removes the outside plug, inspects the tire and installs a plug-patch from inside. If the inspection finds internal damage, the tire will need replacing.
No. Sidewall and shoulder damage should never be plugged or repaired by any method, because those areas flex too much for a repair to hold. A tire with damage there needs to be replaced.
They do different jobs. A plug physically fills the hole and lets a shop finish the repair normally, while aerosol sealant coats the inside of the tire and has to be cleaned out before a proper repair. Some sealants can also affect TPMS sensors, so tell the shop if you used one.
A plug that is too shallow, off-angle or twisted on the way out may leak right away or fail after a few miles. If the soapy water test shows bubbles, do not try to force a second plug into the same hole. Use the spare and have the tire inspected.
A conservative rule of thumb is no more than about 100 miles over a few days before a proper repair. Some plugs hold far longer, but there is no way to know which ones, because nobody has inspected the inside of the tire.
Because the tire industry treats an outside plug as temporary. Shops remove the tire, inspect the inside and install a plug-patch, which seals the inner liner and is a permanent repair.
Check the tire maker’s policy first, since some manufacturers restrict repairs on certain run-flat models. Any tire that was driven flat, even briefly, should not be plugged, because the sidewall may be damaged inside.
The Bottom Line on Plugging a Tire
Learning how to plug a tire is a useful skill, and a rope plug kit plus a small compressor is one of the best inexpensive items you can carry. Choose the right puncture, install the plug carefully, confirm the seal with soapy water and watch the pressure every day afterward.
Then finish the job. Treat the plug as a bridge to a proper plug-patch repair, installed from inside the tire by a shop, ideally within about 100 miles and a few days. If the damage is in the sidewall or shoulder, larger than 1/4 inch, or the tire was driven flat, skip the plug entirely and replace the tire.
Sources
Specs, warranty terms and prices were checked on October 22, 2026. Prices change often.
- Firestone Complete Auto Care: Tire repair (patch vs. plug)
- NHTSA: Tires (tire safety and maintenance)
 Summarize this article with:















Leave a comment