


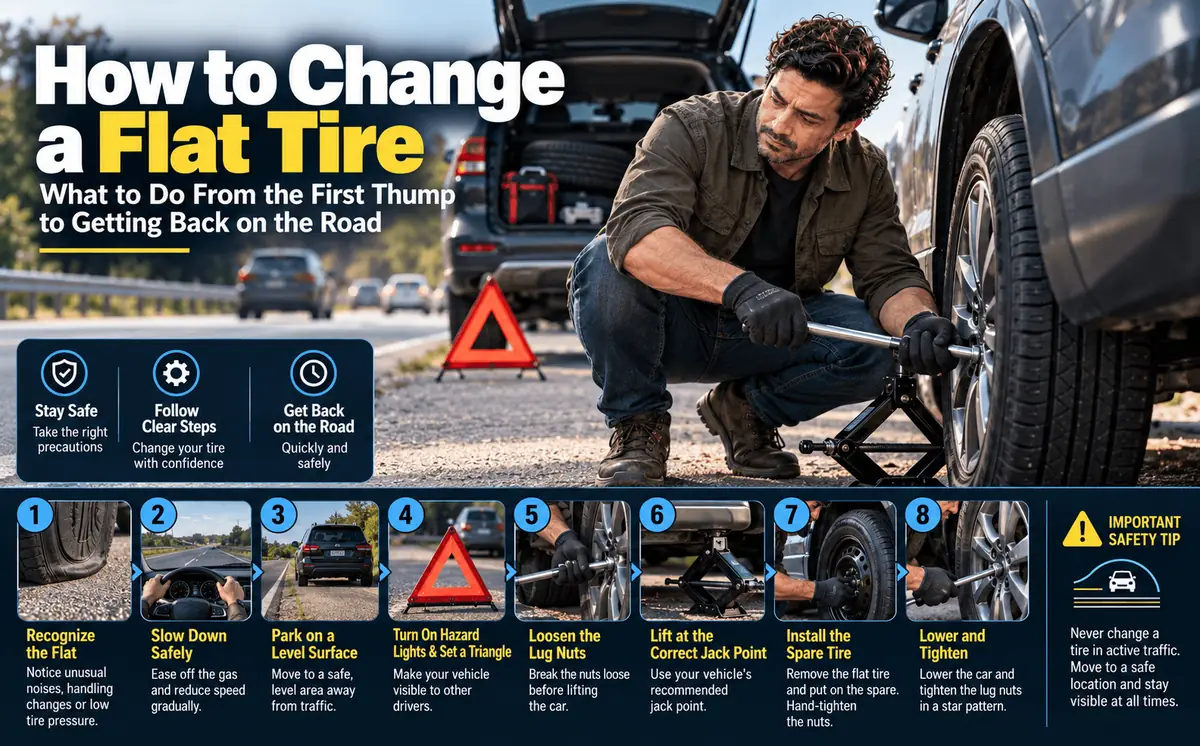
A flat tire almost never happens at a convenient moment. It happens on the highway at rush hour, in a grocery store parking lot in January, or on a two-lane road in a downpour. The thumping starts, the steering goes vague, and the next few minutes decide whether this becomes a minor delay or something much worse.
Swapping the wheel is only part of the job. Handling a flat well means stopping safely, protecting yourself from traffic, changing the tire without the mistakes people make under pressure, driving correctly on the spare, and then dealing with the damaged tire. This guide walks through all of it, for sedans, crossovers, SUVs, and pickups with either a full-size or temporary spare.
How this guide was put together: This guide is general information based on common manufacturer and industry guidance; your owner’s manual is the controlling source. Prices are typical ranges, not quotes. Checked on October 22, 2026.
Table of Contents
Before It Happens: The Five-Minute Preparedness Check
The worst time to find out your spare is flat is when you need it. Next time you are near your car, confirm three things:
- You have a spare. Check under the trunk floor, under the truck bed, or on the rear door. Some vehicles, especially EVs and certain sport models, come with a tire inflation kit or run-flat tires instead.
- The spare is inflated. Spares slowly lose pressure while they sit. One that has drifted down to 15 PSI is nearly as useless as no spare at all. Check it every few months.
- The jack and lug wrench are actually in the car. They have a way of migrating to the garage and staying there.
While you are at it, look at the spare’s DOT date code. The last four digits show the week and year it was made, and many tire manufacturers recommend replacing spares after about 6 to 10 years, even if they have never touched the road, because the rubber ages internally.
Your Flat Tire Kit
| Item | What It’s For |
|---|---|
| Spare tire (full-size or donut) | The replacement wheel |
| Jack (scissor or hydraulic) | Lifting the vehicle |
| Lug wrench | Removing and installing lug nuts |
| Owner’s manual | Jack point locations and lug nut torque |
| Wheel wedges or chocks | Keeping the car from rolling |
| Flashlight or headlamp | Working at night or in poor light |
| Reflective triangles or road flares | Warning approaching drivers |
| High-visibility vest | Making yourself visible on the shoulder |
| Gloves | Protecting your hands from grime and sharp edges |
| Torque wrench | Tightening lug nuts to spec |
| Tire pressure gauge or portable compressor | Checking the spare before you drive |
Most cars come with the first four. A basic click-style torque wrench costs roughly $25, and it is the item most drivers skip and most should own. Under-tightened lug nuts can loosen on the highway, and over-tightened ones can snap a stud at the next tire rotation.
The Moment It Happens: Stopping Safely
When you hear a thump or flapping, feel the car pull hard to one side, or notice the steering suddenly feels loose:
- Don’t brake hard. Hold the steering wheel firmly with both hands and ease off the accelerator gradually.
- Turn on your hazard lights right away.
- Look for the safest nearby place to stop: a wide shoulder, a parking lot, an exit ramp, or a side street. Driving slowly on the flat for a short distance to reach safety is far better than stopping in a live lane, even if it damages the tire or rim.
- On a highway, move as far right as you can, ideally off at an exit if one is close. Never change a tire in a travel lane.
Once you have stopped, put the car in Park (or first gear in a manual), set the parking brake, and if you are on a slope, turn the front wheels toward the curb or guardrail.
Set Up a Safety Zone
Before you touch the tire, make yourself visible and protected:
- Place reflective triangles or flares behind the car, starting about 10 feet back and adding another around 100 feet back if traffic is moving fast. On a high-speed road, more distance is better.
- Wear a high-visibility vest if you have one.
- Work from the side of the car away from traffic whenever possible.
- Chock the tire diagonally opposite the flat.
If there is no safe place to work, stay in the vehicle with your seat belt fastened and call for help.
Changing the Tire: The Essential Steps
Our step-by-step guide to changing a car tire covers each stage in detail. Here is the sequence, with the points that matter most when you are doing it under pressure.
- Get the spare and tools out. On pickups, the spare often hangs under the bed and lowers with a crank; your owner’s manual explains the release. Lay everything out within reach.
- Loosen the lug nuts before you jack. Turn each one counterclockwise until it breaks free, but do not remove it yet. With the tire on the ground, the wheel cannot spin while you work. If a nut will not budge, put the wrench on it with the handle roughly horizontal and press down with your foot, keeping your balance. On alloy wheels, make sure the wrench fits squarely so it does not scratch the finish.
- Position the jack at the correct lift point. Use the reinforced point shown in the owner’s manual, usually a notch or arrow on the pinch weld beneath the door, just behind the front wheel or ahead of the rear wheel. Jacking from the wrong place can crush a rocker panel, a repair that can easily run $500 to $1,500, or let the car slip.
- Raise the car until the flat is about 6 inches off the ground, watching the jack as it takes the weight. The inflated spare will need more clearance than the flat.
- Remove the lug nuts and the flat. Keep the nuts in a pocket or cup, since losing one on a busy shoulder is miserable. Lift with your legs; wheels on trucks and SUVs are heavy.
- Mount the spare. Align the holes with the studs, push it flush against the hub, and thread one or two nuts loosely by hand to hold it while you align the rest.
- Hand-thread all the nuts clockwise, then snug them in a star pattern, moving to the roughly opposite nut each time rather than around the circle.
- Lower the car partway so the tire carries some weight, tighten each nut again in the star pattern, then lower it fully and remove the jack.
- Do the final tightening. With a torque wrench, follow your vehicle’s specification; most passenger cars fall in the 80 to 100 ft-lb range, and trucks often call for 100 to 140 ft-lbs. Without one, tighten firmly and get to a shop to have them torqued correctly.
- Check the spare’s pressure. A full-size spare should match the pressure on the door-jamb placard, not the number on the sidewall. Most temporary spares call for 60 PSI, much higher than a regular tire.
- Stow everything securely and do a quick walk-around: nuts seated, wheel flush, nothing left on the ground.
Never crawl under a car supported only by a jack. Factory jacks are meant for lifting the car to change a tire, nothing more. If you drop something underneath, leave it until the car is back on the ground.
Driving on Your Spare
Full-Size Spare
A full-size matching spare lets you drive normally. Still, get the flat repaired or replaced soon, because until you do, you have no backup if you get another one.
Temporary or “Donut” Spare
This is where many drivers get into trouble. A temporary spare uses a different rubber compound, shallower tread, and a narrower profile than a regular tire. It exists to get you to a repair shop, nothing more.
| Consideration | Typical Donut Guidance |
|---|---|
| Maximum speed | 50 mph |
| Maximum distance | About 50–70 miles |
| Highways | Avoid where possible |
| Handling and braking | Reduced grip; allow extra distance and take on-ramps carefully |
| AWD and 4WD vehicles | Get to a shop right away |
Always check the limits printed on your spare’s sidewall, since they can vary.
A note for all-wheel-drive owners: AWD systems expect all four tires to rotate at nearly the same speed. A smaller donut forces the drivetrain to compensate constantly, which can stress the differentials and lead to an expensive repair. If your vehicle allows it, disengage AWD, drive slowly, and get to the nearest shop.
Expect a TPMS Warning
After you mount a spare, your tire pressure monitoring light will often come on, especially if the spare has no pressure sensor. That is normal. It should clear once all four wheel positions have properly inflated tires with working sensors again.
What to Do With the Flat Tire
A flat does not automatically mean a new tire. Whether it can be repaired depends on where the damage is and how the tire was treated afterward.
| Likely Repairable | Must Be Replaced |
|---|---|
| Puncture in the central tread area | Any sidewall damage: cuts, bulges, bubbles, or punctures |
| Puncture smaller than 1/4 inch in diameter | Damage in the shoulder area |
| Tire was not driven on while flat | Multiple punctures close together |
| Tire was driven on while flat or badly underinflated |
Driving any distance at speed on a flat can destroy the sidewall from the inside, even if it looks fine from the outside, which is why that tire needs replacing regardless of where the puncture is.
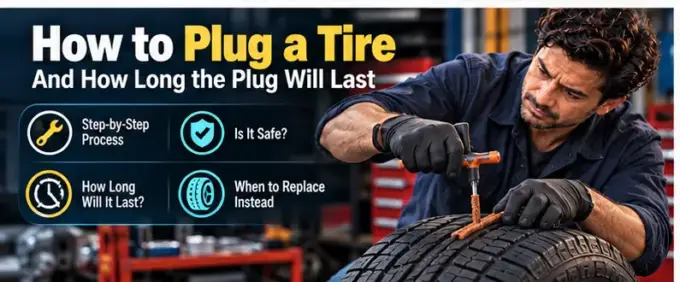
For a repairable puncture, insist on a proper combination repair: the tire is removed from the wheel, and the hole is filled and patched from the inside. A reputable shop typically charges around $25 to $35. A plug pushed in from the outside alone is not considered a complete repair under industry standards.
Do You Need to Replace More Than One Tire?
On most front-wheel-drive and rear-wheel-drive vehicles, you can replace just the damaged tire. On AWD and 4WD vehicles, a new tire next to three worn ones creates a difference in tread depth, and therefore diameter, that can strain the drivetrain. Many AWD manufacturers specify a maximum allowable tread-depth difference between tires, so check your owner’s manual before deciding. Our guide to checking tire tread depth explains how to measure.
Common Mistakes to Avoid
- Tightening lug nuts in a circle. It is the most common error, and it can seat the wheel unevenly, causing vibration or a wheel that loosens. Always use a star or crisscross pattern.
- Never checking the spare. A deflated spare is always discovered at the worst possible moment.
- Ignoring donut limits. The roughly 50 mph and 50 to 70 mile guidance exists because temporary spares are built for short emergency use only.
- Forgetting the flat in the trunk. Get it repaired or replaced promptly so you are not driving around without a usable spare.
- Jacking at the wrong point. Always use the reinforced points shown in the owner’s manual.
- Accepting impact-gun over-tightening. Shops that blast lug nuts on with an impact wrench can leave them nearly impossible to remove with a roadside lug wrench. Ask your shop to torque them by hand or with a torque stick.
When to Call for Help Instead
It is smart, not weak, to call roadside assistance when:
- You are on a busy highway with no safe shoulder and cannot reach an exit
- It is dark and you are somewhere unfamiliar or unsafe
- A health condition makes lifting or crouching unsafe
- Your vehicle has no spare and the damage is more than a small tread puncture that an inflation kit can handle
- You cannot loosen the lug nuts with the tools you have
Help may be available through an auto club such as AAA, your insurance policy, or your vehicle manufacturer, many of which include roadside coverage for the first few years of ownership.
Frequently Asked Questions
With practice and the right tools, about 15 to 20 minutes on a safe, flat surface. Your first time may take 30 to 40 minutes, which is perfectly normal.
Yes, in most cases. The hardest part is usually handling the wheels themselves, especially on trucks and SUVs. If you have a physical limitation, calling for help is the right choice.
Typically about 50 to 70 miles at speeds no higher than 50 mph, but follow the limits printed on your spare. Its job is to get you to a tire shop.
Often, if the puncture is in the central tread, smaller than 1/4 inch, and the tire was not driven on while flat. Sidewall or shoulder damage, multiple nearby punctures, or a tire that was run flat means replacement.
Many spares do not have a pressure sensor, so the system reports a missing or low reading. The light should reset once your regular tire, with its sensor, is back on the car and properly inflated.
Usually not on two-wheel-drive vehicles. On AWD and 4WD vehicles, a large tread-depth difference between tires can stress the drivetrain, so check your owner’s manual for the allowable difference before replacing just one.
Check the pressure, look for cracks or bulges, and read the DOT date code. Many manufacturers recommend replacing a spare after about 6 to 10 years regardless of appearance.
The Bottom Line
Handling a flat well is mostly about what happens before and around the wheel change: stopping somewhere safe, making yourself visible, and knowing the limits of the spare you are driving on. The tire swap itself is manageable for most drivers, especially if you loosen the nuts before you jack and tighten them in a star pattern.
Make two habits stick: check your spare’s pressure every few months, and never tighten lug nuts in a circle. Then, when the thumping starts, you will know exactly what to do next.
Sources
Specs, warranty terms and prices were checked on October 22, 2026. Prices change often.
- Firestone Complete Auto Care: Tire repair (patch vs. plug, repair prices)
- NHTSA: Tires (tire safety, pressure and maintenance)
 Summarize this article with:












Leave a comment