


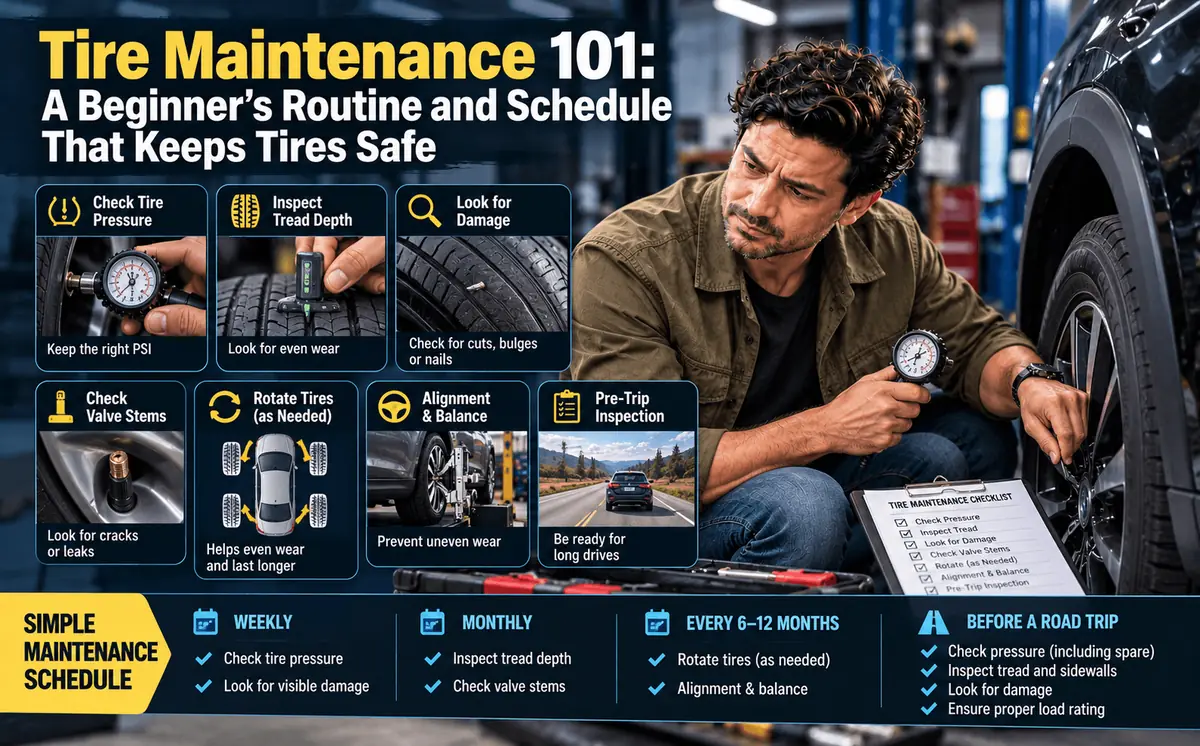
Most drivers know their tires need some kind of care, but few know exactly what to do or how often. The owner’s manual buries the advice in fine print, the shop offers services you can’t evaluate, and the tires themselves look fine right up until one wears out early, starts vibrating, or goes flat on the highway. Without a routine, tire care becomes a series of surprises, and surprises with tires tend to be expensive.
The good news is that a complete tire maintenance routine takes very little time once you know the pieces. This guide lays out each task, explains why it matters, and puts everything into one schedule you can actually follow. It keeps the inspection side brief, since our tire inspection checklist covers that step by step.
Table of Contents
Why a Routine Beats Reacting
Tires wear slowly and quietly. Pressure drops a little each month, one axle wears faster than the other, and a slightly bent suspension part scrubs rubber off one edge a little at a time. None of it is obvious until the damage is done: a tire worn bald on its shoulders, a vibration at 65 mph, or a set that needs replacing thousands of miles early.
A routine catches those problems while they are still cheap. Most tasks below cost nothing but a few minutes, and the shop jobs are inexpensive next to a new set of tires. The payoff is longer tread life, better fuel economy, and tires that brake and grip the way they should.
Tire Pressure: The Monthly Habit That Matters Most
If you only do one thing on this list, make it this. Correct pressure affects nearly everything a tire does, from braking distance and steering response to fuel economy and how evenly the tread wears.
Check Cold, Once a Month
Check all four tires at least once a month and before any long trip. Do it when the tires are cold, meaning the car has been parked for a few hours or driven only a mile or so. Driving warms the air inside and pushes the reading up, so a hot tire can look correct when it is actually low.
Use your own digital or dial gauge rather than the one on a gas station air hose, and keep it in the glove box. Don’t judge pressure by eye. A tire can be badly underinflated and still look normal, especially with a low-profile sidewall.
Use the Door Placard, Not the Sidewall
The correct pressure for your car is on the placard inside the driver’s door jamb, and it also appears in the owner’s manual. Some vehicles call for different pressures front and rear, so read both numbers. The figure molded into the tire sidewall is the maximum the tire can safely hold, not the pressure your vehicle should run.
Expect pressure to change with the seasons. Air contracts as it cools, and tire pressure falls about 1 psi for every 10°F drop in outside temperature. A tire set correctly in August can be several psi low on the first cold morning in November, which is why monthly checks matter most in the fall. When temperatures climb again in spring, recheck so the tires aren’t left overinflated after a winter top-off.
Keep the Valve Caps On
Valve caps are cheap and easy to lose. The valve core inside the stem does the real sealing, but the cap keeps dirt, water, and road salt away from it. Grit that works into the core can hold it slightly open and cause a slow leak. Replace missing caps right away, and screw them on finger tight after every pressure check.
Rotation: Spreading the Wear Evenly
Tires don’t wear at the same rate in every position. On a front-wheel-drive car, the front tires handle steering, most of the braking, and all of the power delivery, so they wear noticeably faster than the rears. Rotation moves each tire to a new position so all four wear down together.
Rotate every 5,000 to 7,500 miles, or follow the interval in your owner’s manual if it gives a different one. Pairing it with oil changes makes it easy to remember.
The correct pattern depends on the vehicle and the tires:
- Front-wheel drive: the fronts move straight back, and the rears cross to the opposite sides of the front axle.
- Rear-wheel drive and most all-wheel drive: the rears move straight forward, and the fronts cross to the opposite sides of the rear axle.
- Directional tires: these must keep rolling the same direction, so they move front to back on the same side only.
- Staggered setups: when the front and rear tires are different sizes, they generally can’t be moved between axles at all.
Your owner’s manual lists the recommended pattern. After any rotation, reset the pressures, since front and rear specs may differ. If you rotate at home, use a proper jack, jack stands, and a torque wrench to tighten the lug nuts to spec.
Alignment: Keeping the Tires Pointed Straight
Alignment refers to the angles at which your wheels meet the road. When those angles drift out of spec, the tires no longer roll perfectly straight. They scrub sideways a little with every mile, which wears the tread unevenly and can make the car pull to one side.
Have the alignment checked once a year, and sooner if any of these happen:
- The car pulls or drifts to one side on a straight, level road.
- The steering wheel sits off center when you drive straight.
- You notice wear on just one edge of a tire, or a feathered, saw-tooth feel across the tread.
- You hit a deep pothole or a curb hard.
- You install new tires or have steering or suspension parts replaced.
An alignment check costs far less than the tread a misaligned car can eat, and many tire shops discount one with a new tire purchase.
Balancing: Stopping the Shake
No tire and wheel assembly has perfectly even weight all the way around. Balancing corrects that by adding small weights to the wheel so it spins smoothly. An unbalanced wheel tends to shake at highway speed, usually felt through the steering wheel when a front wheel is out and through the seat or floor when a rear wheel is out.
Tires are balanced when mounted and should be rebalanced when a vibration appears, after a repair or remount, or if a wheel weight falls off. Many shops also recheck balance during rotation. Left alone, an imbalance can cause choppy, uneven tread wear and puts extra stress on suspension and steering parts.
Tread Checks: Knowing When Tires Are Done
Tread depth decides how well a tire clears water, slush, and snow. Most U.S. states set the legal minimum at 2/32 of an inch, but wet traction falls off well before that point. Plenty of safety experts suggest planning a replacement around 4/32 inch if you drive in heavy rain, and earlier still if you depend on the tires in snow.
You can check tread three ways:
- Wear bars: small raised bridges molded across the bottom of the main grooves. When the tread is flush with them, the tire is at 2/32 inch and due for replacement.
- The penny test: insert a penny head first into a groove. If you can see the top of Lincoln’s head, the tread is at or below 2/32 inch.
- A tread depth gauge: the most precise option, and inexpensive. Measure in several grooves across the tire, since uneven readings point to an alignment, pressure, or balance problem.
Check tread monthly when you check pressure. While you are down at tire level, take a quick look for nails, cuts, cracks, or bulges in the sidewall. Any bulge or sidewall cut means the tire should come off and be inspected by a shop. Our tire inspection checklist walks through the full visual check in more detail.
Tire Age
Rubber ages even when the tread looks fine. Many vehicle manufacturers advise replacing tires around six years old, and tire makers generally set ten years as the outer limit regardless of tread. You can find a tire’s age in the last four digits of the DOT code on the sidewall: 2419 means the 24th week of 2019. This matters most for low-mileage cars, trailers, and spares that may never wear out their tread.
Cleaning Tires Without Damaging Them
Washing tires is about more than looks. Road salt in particular can corrode the wheel where the tire seals against it.
Mild soap, water, and a stiff brush are all most tires need. Rinse thoroughly and let them dry. Be careful with tire dressings and shine products. Dressings that contain petroleum distillates can draw protective chemicals out of the rubber and speed up drying and cracking. Water-based dressings are the safer choice if you want a finished look, and harsh degreasers or all-purpose cleaners that strip rubber are best kept off the sidewalls.
Skip petroleum-based tire shine. A glossy sidewall today can mean premature cracking a few seasons from now.
Storing Seasonal Tires
If you switch between winter tires and all-season or summer tires, the set you aren’t using spends months in storage, and how you store it affects how long it lasts.
- Clean and dry them first. Wash off salt and brake dust and let the tires dry fully.
- Mark their positions. Note which corner each tire came from so you can rotate them when they go back on.
- Keep them cool, dry, and dark. Sunlight and heat age rubber. A basement or climate-controlled space beats a hot shed.
- Keep them away from ozone sources. Electric motors, furnaces, and generators produce ozone, which attacks rubber.
- Bag them. Airtight tire storage bags limit exposure to air and moisture.
- Mind the position. Tires mounted on wheels can be stacked flat or hung. Tires without wheels are best stored standing upright and turned occasionally so they don’t develop flat spots.
When the stored set goes back on, check its pressure and tread before driving, since pressure drops during months of storage. A common rule of thumb for timing the swap is to install winter tires once daily average temperatures stay at or below about 45°F for a week, and switch back once they stay above that mark.
Respecting Load Limits
Every tire has a maximum load it can carry, shown by the load index on the sidewall. Your vehicle has a limit too: the door placard lists the maximum combined weight of passengers and cargo. Exceeding either one makes the tires flex more than intended, which builds heat and raises the risk of failure.
This matters most when towing, hauling, or packing for a road trip. Load the vehicle within its rated capacity, and if your owner’s manual lists a higher pressure for heavy loads, use it, but never exceed the maximum pressure on the tire sidewall. When you buy replacement tires, make sure their load index meets or exceeds the original equipment rating.
Don’t Forget the Spare
A spare tire that is flat when you need it is just extra weight. Because nobody looks at it, the spare is often the most neglected tire on the car.
Check the spare’s pressure every month or two. Compact temporary spares usually run at a much higher pressure than full-size tires, often 60 psi, and the correct figure is printed on the spare itself or on the placard. Remember the limits that come with a compact spare: they are commonly restricted to around 50 mph and a limited distance, so treat one as a way to reach a shop, not a replacement. Spares also age, so check the DOT date on one that has never been used.
It also pays to practice a tire change once in your driveway, so you know where the jack, lug wrench, jacking points, and any wheel lock key are before you need them on a busy shoulder.
Your Tire Maintenance Schedule
| Task | How Often | Who Does It |
|---|---|---|
| Pressure check (all four, cold) | Monthly and before long trips | You |
| Valve cap check | At every pressure check | You |
| Tread depth and quick visual look | Monthly | You |
| Spare tire pressure | Every one to two months | You |
| Cleaning | With regular car washes | You |
| Rotation | Every 5,000 to 7,500 miles or per owner’s manual | You or a shop |
| Balancing | At mounting, after repairs, or when vibration appears | Shop |
| Alignment check | Yearly, after hard impacts, or with new tires | Shop |
| Seasonal swap and storage | Twice a year, if you run two sets | You or a shop |
| Age check | Yearly once tires pass about five years | You |
Keep a simple log in a notebook or phone app with rotation dates, mileage, and any alignment or balancing work. It shows at a glance when the next service is due, and a record of regular rotation can help if you ever file a tread life warranty claim.
Frequently Asked Questions
At least once a month and before any long trip, with the tires cold. Check more often in fall and early winter, when falling temperatures pull pressure down. Use the pressure on your door placard, not the number on the tire sidewall.
Alignment adjusts the angles of the wheels so the tires roll straight and wear evenly. Balancing adds small weights to the wheel so the tire and wheel spin without vibrating. A car that pulls to one side usually needs an alignment, while a shake at highway speed usually points to balance.
Water-based tire dressings are generally fine. Products containing petroleum distillates can pull protective compounds out of the rubber and speed up cracking, so they are best avoided. For routine cleaning, mild soap, water, and a brush do the job.
Clean and dry them, mark their positions, and store them somewhere cool, dry, and dark, away from electric motors and other ozone sources. Mounted tires can be stacked or hung, while unmounted tires should stand upright. Check pressure and tread before reinstalling them.
Replace them at the 2/32-inch legal minimum at the latest, and consider doing it earlier if you drive in heavy rain or snow, since wet and winter traction drop off as tread wears. Replace any tire with a sidewall bulge or cut, and plan on replacement as tires approach six to ten years old even with tread remaining.
Making It Stick
Tire maintenance doesn’t demand much skill or money. It demands consistency. A monthly pressure and tread check, rotation every 5,000 to 7,500 miles, an alignment check once a year, and attention to vibration, valve caps, load, and the spare will catch nearly every common tire problem before it turns into a ruined tire or a roadside stop. Put the schedule above on your calendar, keep a gauge in the glove box, and your tires will last longer, grip better, and cost you less over every mile they roll.
 Summarize this article with:


















Leave a comment