


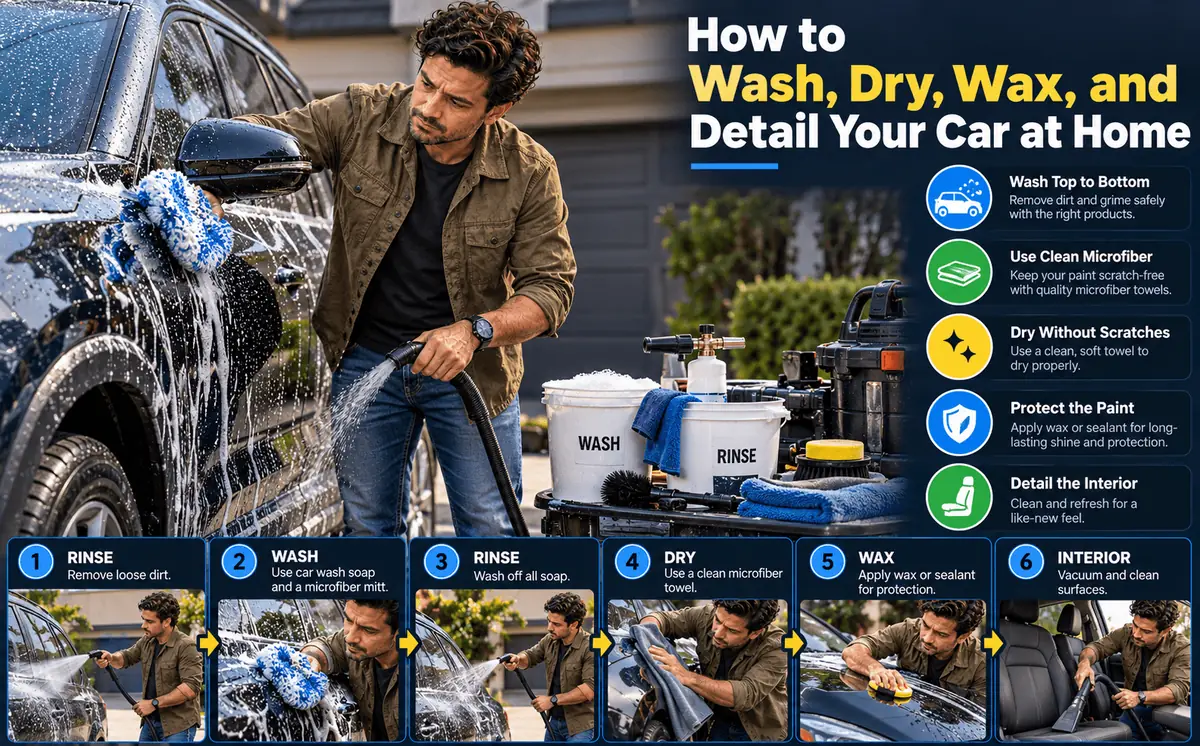
A professional detail can make a car look new again, but it is not cheap, and the shine fades within weeks if the car is washed carelessly afterward. The good news is that most of what a detailer does comes down to the right supplies, a sensible order of work, and a few techniques that avoid scratching the paint. With an afternoon and some patience, you can get close to professional results in your own driveway.
Regular cleaning is not just about looks. Dirt, road salt, bird droppings, and tree sap all attack paint and clear coat over time, and grit ground into carpets and seats wears out the interior. A clean car also holds its value better and makes it easier to spot chips, rust, or damage early. This guide walks through the full process, from supplies to waxing, plus a schedule to keep the car looking good year-round.
Table of Contents
Gather the Right Supplies
The Essentials
| Item | Why It Matters |
|---|---|
| Two buckets, ideally with grit guards | One for soapy water, one for rinsing the mitt, so dirt does not go back onto the paint |
| pH-balanced car wash soap | Cleans without stripping wax; dish soap can remove protection |
| Microfiber wash mitt | Lifts dirt gently; sponges and old rags can trap grit and scratch |
| Separate wheel brushes and mitt | Keeps brake dust and grime away from your paint |
| Non-acidic wheel cleaner | Breaks down brake dust safely on most wheel finishes |
| Stiff tire brush | Scrubs dirt and old dressing from sidewalls |
| Microfiber drying towels | Absorb water without scratching or leaving lint |
| Automotive glass cleaner, ammonia-free | Safe for window tint and leaves fewer streaks |
| Vacuum with crevice and brush attachments | Removes loose dirt before wiping interior surfaces |
| Assorted microfiber towels | Separate towels for glass, interior, wax removal, and dirty jobs |
Color-coding your towels makes it easy to keep wheel and interior towels away from your paint.
Nice-to-Have Extras
- Foam cannon for a pressure washer or a foam gun for a garden hose, to pre-soak and loosen dirt
- Clay bar or clay mitt with lubricant, to remove bonded contaminants such as tar, sap mist, and industrial fallout
- Polish to remove light swirls and oxidation before waxing
- Wax, sealant, or spray ceramic coating for protection and gloss
- Detail brushes for vents, seams, and emblems
- Upholstery and carpet cleaner
- Leather cleaner and conditioner
- Interior protectant for dashboards and plastic trim, preferably a non-greasy, UV-protecting product
Start With a Quick Inspection
Before washing, walk around the car in good light:
- Paint and body: look for scratches, chips, dents, and areas of fading or oxidation. Note anything that needs touch-up paint or professional repair.
- Contaminants: spot bird droppings, bug splatter, tar, and tree sap that will need extra attention. Bird droppings and sap are especially harmful if left to bake in the sun.
- Undercarriage and wheel wells: with a flashlight, check for rust or flaking metal, especially if you live where roads are salted. Pay attention to brake and fuel lines, the exhaust, and the frame. Rust caught early is far easier to deal with.
Wash the Exterior
Choose your spot. Wash in the shade, with the paint cool to the touch. Sun and hot panels dry soap and water too fast, leaving spots and streaks.
1. Clean the wheels and tires first. Wheels are usually the dirtiest part of the car. Cleaning them first prevents brake dust and grime from splashing onto freshly washed paint. Work one wheel at a time: spray a non-acidic wheel cleaner, let it dwell briefly as directed, agitate with wheel brushes, scrub the tire sidewall, then rinse thoroughly. Use separate tools and a separate bucket of water for wheels.
2. Rinse the whole car. Use a hose or a pressure washer on a gentle setting, keeping the nozzle a safe distance from the paint and away from damaged areas, badges, and delicate trim. This removes loose dirt before you touch the paint.
3. Pre-soak if you can. A foam cannon or foam gun covers the car in thick suds that soften dirt, making contact washing safer.
4. Use the two-bucket method. Fill one bucket with soapy water and the other with clean rinse water, each ideally with a grit guard at the bottom.
- Load the mitt with soapy water.
- Wash one section, starting at the top of the car.
- Rinse the mitt in the clean water bucket, rubbing it against the grit guard to release dirt.
- Reload with soap and move to the next section.
5. Work from the top down. Wash the roof, then the glass, hood, and trunk, then the upper sides, and finally the lower panels and bumpers, which are the dirtiest. Use light pressure and straight-line motions; circular scrubbing is more likely to create visible swirl marks.
6. Rinse as you go. In warm weather, rinse each section before the soap dries. Replace your wash water if it gets noticeably dirty.
7. Final rinse. Rinse the whole car from top to bottom. Letting water sheet off the panels with an open hose, without a nozzle, can leave less water behind to dry.
8. Spot-treat stubborn contaminants. Use a bug and tar remover for anything left behind, then rinse the area again.
Optional: clay the paint. If the paint feels rough after washing, a clay bar or clay mitt with plenty of lubricant will pull out bonded contaminants and leave the surface smooth and ready for wax.
Dry Without Scratching
Drying properly prevents water spots, which can etch the surface if mineral-heavy water dries on the paint.
- Use a large, plush microfiber drying towel or a quality chamois. Avoid bath towels, which can shed lint and scratch.
- Blot or drag gently. Lay the towel flat and pull it across the panel with light pressure, or pat the surface dry. Do not scrub.
- Work from the top down, so drips do not land on areas you have already dried.
- Get the hidden spots. Dry door jambs, mirrors, the trunk and hood edges, the fuel door, and around trim and emblems where water collects. A leaf blower or car dryer helps push water out of crevices.
- Use a drying aid if you like. A light mist of quick detailer or spray wax on the wet surface helps the towel glide, reduces the risk of marring, and adds a little gloss.
- Wring out or swap towels as they get saturated.
Clean the Windows
Clean glass is a safety item, not just a cosmetic one.
- Use an ammonia-free automotive glass cleaner, which is safe for window tint and leaves fewer streaks.
- Spray the towel, not the glass, especially inside the car, to avoid overspray on the dashboard and electronics.
- Use a waffle-weave or dedicated glass microfiber towel. Avoid paper towels and newspaper, which leave lint.
- Wipe one side of the glass horizontally and the other vertically. That way, any streak you see tells you which side it is on.
- Buff dry with a second clean, dry towel.
- Do not forget the top edges of side windows, which you can reach by lowering them slightly, and the inside of the windshield, where a film builds up from interior plastics and air pollution.
Finish the Wheels and Tires
With the wheels cleaned at the start, finish them off once the car is dry:
- Protect the wheels. A wheel sealant or spray protectant creates a slick barrier that makes brake dust easier to wash off next time. Some paint waxes and sealants are also safe for painted or clear-coated wheels; check the label.
- Dress the tires. Tire dressings range from water-based formulas, which give a natural satin look, to solvent-based gels and aerosol foams, which give more gloss. Apply with a foam applicator rather than spraying directly, wipe off excess, and keep dressing off the tread and away from brake components. Durability varies by product and weather, from a few days to a few weeks.
Clean the Interior
A thorough interior clean improves comfort, removes allergens, and slows wear.
1. Remove clutter and floor mats. Take out trash and loose items, and pull the mats out to clean separately.
2. Vacuum from the top down. Start with the headliner and seats, then work down to the carpet. Use the crevice tool between and under the seats, around the console, and along seat tracks. Move the seats forward and back to reach everything. A stiff brush helps loosen dirt from carpets before vacuuming.
3. Clean the floor mats. Shake out and vacuum carpet mats, then shampoo stains with carpet cleaner and let them dry completely. Rubber mats can be scrubbed with all-purpose cleaner and rinsed.
4. Clean hard surfaces. Dust the dashboard, console, door panels, and vents with a soft brush and microfiber towel. For grime, use a mild interior cleaner sprayed onto the towel, not directly onto the surface, and wipe gently. Avoid harsh chemicals that can discolor plastics.
5. Take care with screens. Clean infotainment and instrument screens with a soft, clean microfiber cloth, lightly dampened with water or a screen-safe cleaner. Avoid ammonia, alcohol-heavy cleaners, and paper towels.
6. Clean the upholstery.
- Fabric seats: spot-treat stains with upholstery cleaner, agitate gently with a soft brush, and blot with a clean towel. Avoid soaking the fabric.
- Leather seats: wipe with a leather-specific cleaner on a damp microfiber towel, working gently into seams. Follow with a leather conditioner to keep it supple and help prevent cracking. Avoid all-purpose cleaners and excess water.
7. Protect plastics and trim. A UV-protecting interior dressing helps prevent fading and cracking. Choose a matte or satin finish for the dashboard; glossy products can cause glare on the windshield.
8. Finish with the interior glass and a final vacuum.
Wax and Protect the Paint
Wax or sealant adds gloss and a protective layer that shields the clear coat from UV rays, contaminants, and water, and makes the next wash easier.
Choosing a Protection Product
| Product | Characteristics | Typical Durability |
|---|---|---|
| Carnauba wax | Natural wax with a warm, deep glow | Shorter; often reapplied every few weeks to couple of months |
| Synthetic sealant | Polymer-based, glassy shine, strong protection | Longer than carnauba, often several months |
| Spray wax or spray sealant | Quick and easy, great for topping up protection | Shorter, but very easy to reapply |
| Ceramic coating or ceramic spray | Hard, slick, water-repelling layer | Sprays last months; professional coatings can last years |
Durability depends heavily on the product, climate, and how the car is washed and stored. Our guide to how the sun affects car paint compares these options in more detail.
How to Apply Wax or Sealant
- Start with a clean, dry car, ideally clayed for the smoothest finish. If the paint has light swirls or dullness, a polish before waxing will improve the result.
- Work in the shade on cool paint.
- Apply a thin, even coat with a foam or microfiber applicator, one panel at a time. A thin coat is easier to remove and works just as well as a thick one.
- Let it haze for the time on the product label.
- Buff off with a clean, plush microfiber towel using light pressure, flipping the towel often to a clean side.
- Check for residue around emblems, trim, and panel gaps, and remove it with a soft brush or towel.
- Add a second coat, if desired, after the first has cured according to the product instructions.
Keep wax off textured black plastic trim, where it can leave white residue. If it happens, a trim cleaner usually removes it.
Car Care Schedule
| Task | How Often |
|---|---|
| Wash the exterior | About every one to two weeks, more often in salt, pollen, or bug season |
| Clean wheels and tires | With every wash |
| Remove bird droppings, sap, and bug splatter | As soon as possible |
| Vacuum the interior | Weekly or every other week |
| Wipe interior surfaces | Monthly |
| Clean glass inside and out | Every couple of weeks, or whenever visibility suffers |
| Shampoo mats and upholstery | As needed, and seasonally |
| Clay the paint | A few times a year, or when the paint feels rough |
| Wax or sealant | Every few months, depending on the product |
| Condition leather | Every few months |
| Inspect paint and undercarriage | Monthly |
Seasonal Priorities
- Spring: wash off winter salt, including the undercarriage, deep clean the interior, clay and wax the paint.
- Summer: wash often to remove bugs and bird droppings before they etch the paint, and protect the dashboard from the sun.
- Fall: remove sap and summer grime, wax the paint before winter, and deep clean the mats.
- Winter: rinse off road salt frequently, focusing on the undercarriage and wheel wells, and vacuum out slush and grit. Our winter car care guide covers salt protection in more detail.
Common Mistakes to Avoid
- Using dish soap, which can strip wax and dry out trim.
- Washing in direct sun, which causes water spots and streaks.
- Using one bucket or a dropped mitt, which drags grit across the paint. If a mitt hits the ground, rinse it thoroughly or swap it.
- Drying with bath towels or a squeegee on paint, both of which can scratch.
- Using wheel brushes and towels on paint, which transfers brake dust.
- Applying wax too thickly or on hot panels.
- Spraying cleaners directly onto screens and dashboards, risking overspray and damage.
- Using greasy, glossy dashboard products that cause windshield glare.
Related Reading
Frequently Asked Questions
About every one to two weeks for most drivers, and more often in winter where roads are salted, or during heavy pollen and bug seasons.
It is best not to. Dish soap is designed to cut grease and can strip wax and sealant. Use a pH-balanced car wash soap.
You use one bucket of soapy water and one of clean rinse water. After washing each section, you rinse the mitt in the clean bucket before reloading it with soap, so dirt is not dragged back across the paint.
Carnauba wax often lasts a few weeks to a couple of months, synthetic sealants several months, and ceramic products longer. Reapply when water stops beading and sheeting off the paint.
First. Wheels are usually the dirtiest part of the car, and cleaning them first keeps brake dust and grime from splashing onto freshly washed paint.
Use an ammonia-free automotive glass cleaner, spray it onto a clean glass towel, wipe one side horizontally and the other vertically, and buff dry with a second clean towel.
The Bottom Line
A great-looking car comes from good habits more than expensive products. Use two buckets and a pH-balanced soap, clean the wheels first, wash from the top down in the shade, dry gently with microfiber, and protect the paint with wax or sealant every few months. Keep the interior vacuumed and wiped down, condition leather, and protect the dashboard from the sun. Follow a simple schedule, and your car will stay cleaner, hold its value better, and look far newer than its age. For the bigger picture on keeping a car in top shape, see our guide to making your car last longer.
 Summarize this article with:
















Leave a comment